Sunday, November 30, 2014

Preserving Leftovers: Turkey Pot Pie

After a big family meal, I enjoy the leftovers for about a day. Then I'm ready for a meal that doesn't include leftovers. And since I love the idea of a dinner ready in the freezer, pot pie is a great way to use the remaining meat. I usually have all the ingredients on hand, so it's easy to pull together. I also like knowing a delicious, comforting meal is ready to be popped in the oven whenever I don't have time to cook.

Once frozen the pies don't need to be thawed before baking and can be made in any size pan, depending on the size of your family. I make both individual and family size. Larger pans may need additional oven time. My favorite pot pies are turkey. Feel free to substitute chicken, beef, lamb or pork. This recipe makes lots of pies, but can be easily halved if you don't have as many leftovers.


Saute onion, celery and carrots in butter until tender.

Stir in flour, then add stock and half and half. Bring to a boil.
Turn off heat and add turkey and peas.

Fill pans with pot pie mixture. I like a single top crust. If you prefer, you could
line the pan with pie dough before filling for a top and bottom crust.

Make and roll out crust. I use cutters to make crust rounds.
For the small tins I used English muffin rings (about 3.5 inches). For the larger
pies I used the bottom of my 7 inch springform pan as a guide.

Top each pan with crust. Wrap tightly and freeze. Consume within six months.
Turkey Pot Pie
2 cups chopped onion
2 cups chopped celery
2 cups chopped carrot
2/3 cup butter
1 cup flour
4 cups turkey or chicken stock, homemade or commercial
2 cups half and half
8 cups chopped cooked turkey
2 cups frozen English peas
2 tsp salt (or to taste)
pepper to taste
Crust (recipe follows)

Saute onion, celery and carrot in butter until tender and the onion is translucent. Add flour, stirring for 1 minute. Add stock and half and half. Cook, stirring until mixture boils. Remove from heat and stir in turkey and peas. Divide among pans, top with crust, wrap tightly and freeze for up to six months.

To serve: preheat oven to 400 degrees. Place frozen pot pie on a baking sheet and bake, uncovered for one hour. Let cool for five minutes before serving.

Crust
Note: This recipe makes enough for top crust. Double if you prefer a top and bottom crust. 
3 cups all purpose flour
1 1/2 tsp salt
1 cup shortening plus 2 Tbs lard or shortening
1/4 cup water (more or less)

Combine flour and salt in a large bowl. Cut in fat until mixture resembles coarse crumbs. Add enough water, mixing with a fork, until crust comes together in a ball. Roll on a lightly floured surface about 1/8 inch thick. Top pot pies with dough. For best results, refrigerate dough for 1 hour before rolling.


Friday, November 28, 2014

Making and Preserving Stock

Homemade stock is easy to make and has a deeper, richer flavor than commercially canned stock. If you're roasting meat and vegetables, you probably already have the ingredients on hand. Keeping several quarts of stock in the freezer means I have a quick, tasty base for soups, stews and sauces.

I used the turkey carcass left over from our Thanksgiving meal, but stock can be made with bones from beef, veal, chicken, lamb, etc.  In addition to the carcass, I added leftover roasted vegetables, pan drippings, gravy, fresh onions, carrots and celery, bay leaves, sage, salt and pepper. Feel free to add your favorite seasonings.

A note about consistency: homemade stock can be gelatinous, rather then liquid. As the bones are boiled marrow is released, which when refrigerated, thickens the stock. When reheated, it will return to a beautiful, velvety consistency.

To a large stock pot, add turkey carcass with meat removed, vegetables
roasted with the turkey, turkey skin, pan drippings,
leftover gravy, fresh onions, celery and carrots, and herbs.

Cover with water and bring to a simmer. Don't worry about the fat. Once the
stock is cooled, you can easily remove the fat.

Bring the stock up to a boil and reduce heat to simmer.
Continue to cook, covered, for three hours, stirring occasionally.

After three hours, strain stock into a large container. Refrigerate overnight.

After being refrigerated the fat will solidify on top of the stock. Remove
fat and place stock in freezer containers. Freeze and use within six months.


Tuesday, November 25, 2014

Cranberry Sauce

While cranberry sauce is a staple at our Thanksgiving table, I also make it throughout the winter when fresh cranberries are available. Tart and bright, it's a nice foil to roasted poultry and pork. And while it's a great side, the sauce is a fantastic condiment on grilled meat and cheese sandwiches (your grilled cheese will never be the same). I even spread it on my toast.

Fresh berries and orange zest provide a completely different flavor and texture from the canned stuff. It comes together fast, can be made a day in advance and lasts for a week in the fridge.

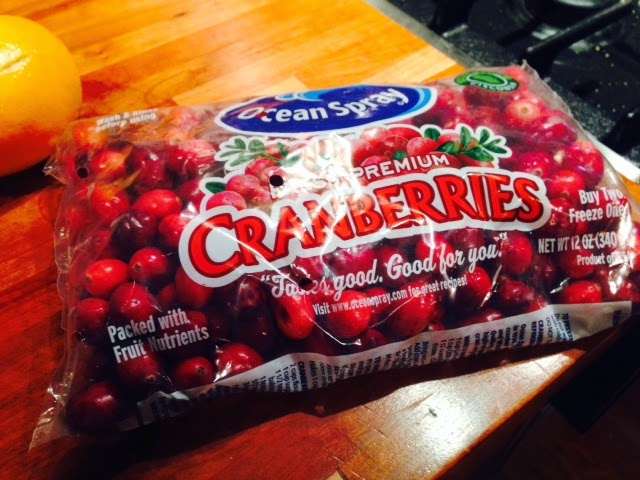
Fresh cranberries are in season during the fall. Start with a 12 oz bag and a small orange.
Place all ingredients, except for the nuts, in a medium saucepan.

Bring to a boil then reduce heat to simmer. Cook 4-5 minutes.

As the berries cook, you'll hear them "pop".

The sauce will continue to thicken as it cooks.

After simmering for five minutes, sauce will be thick. Remove from heat to cool slightly.
Stir in pecans and chill for at least two hours. Enjoy!

Cranberry Sauce
Zest of one small orange
3/4 cup orange juice
2/3 cup sugar
1/4 tsp cinnamon
1/4 tsp ground ginger
dash of ground cloves
1 12-oz pkg. cranberries
1/2 chopped pecans

Combine all ingredients except pecans in a medium saucepan. Bring mixture to boil and reduce heat to simmer. Cook, stirring occasionally 4-5 minutes until cranberries pop. Remove from heat. Cool slightly. Stir in pecans and chill sauce at least two hours before serving. Makes about 2 1/2 cups sauce.

Friday, November 21, 2014

Holiday Food Prep Schedule

Hosting a holiday meal can make for a stressful day for the host. I'm sort of a stickler about getting the meal on the table at the pre-announced time, so I make a schedule to keep me on track. With an eye on the clock, I can usually have the food on the table within 5-10 minutes of my goal.

To get the entire meal on the table at the same time, I enlist both my ovens and a turkey roaster. I've adapted the schedule below to include a microwave and crock pot, in case you have just one oven. A note about a roaster: you might think it's an unnecessary kitchen tool that you'll use only once a year. In addition to roasting a holiday turkey, ham or beef roast, this workhorse can also be used to roast multiple chickens simultaneously and feed hungry crowds sausage & peppers, pulled pork, chicken & noodles and more. 

This 70+ year old roaster belonged to my grandmother. The top can be separated from the base
for countertop use. The masking tape on the upper right was placed there by Grandma Egner
so no one would (accidentally) take her roaster from covered dish dinners and farm meals. 

A note about roasting turkey: The roasting time below is for a 14 lb. unstuffed turkey with a 1pm finish time. To learn how long to roast your turkey, check the Butterball roasting chart. If you're stuffing your turkey, be sure to place stuffing in cavity just before placing in the oven. Stuffing the bird the night before can encourage bacteria growth. Also, pop-up timers can be faulty. Determine doneness with a meat thermometer: 165 degrees at the meatiest part of the thigh and breast, making sure not to touch the thermometer to the bone.


Sample Holiday Meal Schedule


Two days before the meal
  • Prepare bread for stuffing: cut into cubes and dry in a 400 degree oven for 20 minutes stirring once. Cool and store in a sealed bag until ready to use
  • Make and refrigerate cranberry sauce.
  • Make and refrigerate brine.


Day before the meal
  • Saute vegetables for stuffing
  • Place turkey in brine in the afternoon
  • Blanch  and refrigerate fresh vegetables in prep for final cooking: green beans, cauliflower, broccoli, etc.
  • Assemble and refrigerate salads and other cold sides
  • Make pies or other desserts
  • Make and refrigerate mashed potatoes
  • Chill beverages


Day of the meal
8:30am Preheat oven/roaster
Prep turkey for roasting
9:00 Place turkey in oven/roaster
Crockpot: Heat premade mashed potatoes on low 
stirring occasionally
Prep veggies for roasting, sauteing or boiling
11:30 Assemble stuffing
12:30 Remove turkey from oven/roaster to rest for 30 minutes
Oven: Bake casseroles requiring dry heat (stuffing, 
mac & cheese, etc.)
Oven: Roast veggie sides
Stove: saute/boil veggie sides
Strain pan drippings into saucepan and make slurry for gravy
12:45 Microwave: Heat casseroles that can withstand 
moist heat (squash, green beans)
12:50 Stove: Make gravy
1:00 Let’s eat!!

How do you manage your holiday feast?

Monday, November 17, 2014

Pizza Pasta (baked penne)

When folks learn that I preserve the food from our garden they often ask: "How do you use all that food?"

My goal in preserving our garden is not just to enjoy it all year, but also to have products on hand that make meal prep easier. One of my go-to quick, satisfying dishes is Pizza Pasta which uses our jarred tomatoes and pickled banana peppers, frozen sweet peppers, and cayenne made from our dried peppers.

The recipe is an oldie-but-goodie from my college days. You can increase or decrease the ingredients to feed more or less people, bake in a large casserole or individual ramekins and use whatever pizza toppings you like. We're fans of pepperoni, sausage and banana peppers. It would be just as tasty with different meats and sauces (chicken, artichoke and bacon with a white sauce sounds good).

Pair with a fresh, crispy salad and homemade focaccia for a hearty dinner.

We buy half a hog twice a year from Six Buckets Farm.
The hog is processed locally which allows us to select seasonings.
We usually order hot Italian and breakfast sausage.

In a large pan brown sausage. I typically use 1/2 lb for this recipe.
While sausage browns, cook pasta according to package directions.

Remove browned sausage from pan, pouring off all but 2 Tbsp fat.
Add chopped peppers and onions to the pan. Saute for 5-6 minutes.
Add garlic and cook 1 more minute.
I use 3 cups of home canned tomatoes.
If you don't preserve tomatoes, substitute commercially canned. 

While vegetable saute, chop herbs. We still had fresh parsley and rosemary.
I added dried basil and oregano along with a pinch of our cayenne pepper.

Add tomatoes, tomato paste, sugar, cayenne, herbs, salt and pepper. Simmer 5 minutes.

Combine sauce with cooked pasta and place in prepared dish. Top with pizza toppings.
I especially like the spicy, vinegary bite of pickled peppers.

We preserve a variety of peppers, but use the banana peppers in pasta,
salads and as a sandwich topper.
Top with cheeses and bake at 400 degrees for 15 minutes.
Remove from oven and allow to cool for 5 minutes. Cheesy, saucy, comforting goodness!

Pizza Pasta
12 oz penne or ziti. I prefer whole grain.
2-3 Tbsp olive oil
1 cup each chopped onion and sweet red or green pepper
1-2 cloves garlic, minced
3 cups canned tomatoes with juice, home or commercially canned
2 Tbsp tomato paste
1 tsp sugar
pinch of cayenne, optional
Basil, oregano, rosemary, parsley, salt and pepper to taste
8 oz mozzarella, shredded
1/4 cup parmesan, shredded
Assorted pizza toppings of your choice: banana peppers, cooked Italian sausage, pepperoni, olives, etc.

Preheat oven to 400 degrees and grease a 9x13 casserole dish. Cook pasta according to package directions, drain and set aside. In a large pan, saute onion and sweet peppers in olive oil until translucent, about 5-6 minutes. Season with salt and pepper. Add garlic and continue to cook an additional minute. Add tomatoes, paste and sugar. Simmer until thickened, about 5 minutes. Add cayenne, herbs and season with salt and pepper. Toss sauce with pizza toppings, pour into prepared dish and top with cheeses. Bake for 15 minutes or until bubbly and browned on top. Let cool 5 minutes before serving. Makes four generous servings.  

Sunday, November 9, 2014

The Commissary

I recently had dinner at a new kitchen in Columbus. The Commissary isn't a restaurant but a food gathering place for the community. Food entrepreneurs can get help starting a business, established food businesses can access prep/storage space and test new concepts, and the public can meet for classes, events and food conversations.

My invitation came as a result of my contribution to The Commissary's Kickstarter campaign. The community helped build the space and donors were the first people to see it. In addition to a certified, commercial kitchen, The Commissary houses a dairy processing room, home-base for food trucks, a library and a hosting/event space.

The evening included a tasty four-course Korean/Mexican infusion meal prepared by Chef Laura Lee, owner of Ajumama food truck. I'm always interested in conversations around the production and preparation of food and some of the best discussions I've had happened over a meal with people I just met. The talk at our table of seven included everything from which restaurants offer the best biscuits to challenges of home cooking to antibiotic use in livestock populations.

I learned a few things, tried some food I've never eaten before and talked with new friends about growing a local food culture. It was a good night.

The Commissary recognizes it's supporters with a wall of wooden spoons. I'm famous!

The commercial kitchen.

The Commissary walls are decorated with food murals compliments of local artists.

The meal included a sampling of tacos: Left to right, Korean al Pastore (pork),
Wild Sesame Barbacoa (goat) and King Trumpet Mushroom including huitlacoche,
known as corn smut in ag circles. I'd never eaten the fungus and found it to have an earthy
 corn flavor. That's right farmers, corn smut is a delicacy!

Tuesday, November 4, 2014

Drying Rosemary

Rosemary is one of the last herbs to be affected by frost. I can usually rely on harvesting fresh leaves until Thanksgiving. We plants several plants in the herb bed which enables us to enjoy fresh through the summer and fall and dried through the winter and early spring.

Rosemary dries beautifully on the stem in a paper bag. Once the herb is completely dried, I place in a jar with a tight fitting lid. The flavor and aroma typically last for a year.

Our rosemary had a rough start, but took off later in the season.
This is one of five rosemary plants we planted.

Cut low on the stem and place entire stem in a paper bag.
The bag will catch any falling leaves as the stem dries.

Loosely fold down the bag, and place in a warm dry place.
Dried herb can be placed in a jar with a tight fitting lid. Use within a year.
One of my favorite ways to use rosemary is in homemade focaccia, pasta sauces, sprinkled over roasted potatoes and in poultry rubs.

How do you preserve your herbs?